Monday, December 30, 2013

Temperatures When Brewing Coffee

Verve Coffee Roasters has made some very interesting tests regarding water temperatures.

It seems we don't have to be to worried about the boiling water.


It deffiently gives me somethings to keep in mind further on when brewing black.


Enjoy.

/Caspar 

Saturday, December 28, 2013

Whats In My Roaster

MIn this tread I will upload my different roasts. I plan to upload all of them, drip, espresso, SO's and blends.

If I have the time, and I remember, I will share how the beans develops during roast.
I will give my thoughts of the beans after brew. 
I roast on my Gene cafe - sadly my "Coretto" past away this summer, so I had to buy something new. I desided to get a Gene because of the possibility to adjust thru the roast. And it's a lot easier to buy in EU than the Behmor. 

I cool externally in a bucket connected to a vacuumer.


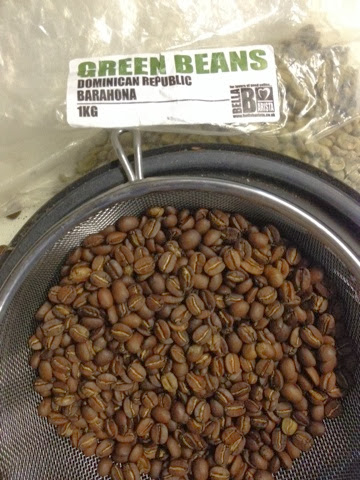
Almost all the coffee I drink is home roast. Until now all my green beans is from  different bulks from Bella Barista Uk.

Roast #1


I haven't put much thought in to this roast. Basically I just put them together in the way I think of them separately. Not so much how I think they will develope together. Doesn't have the talent for that. I really like the deep notes from the Nicaragua. The Costa Rica is not one of my favorite beans, but it does well as a base in blends. I hope the Ethiopia will work its acidity well with the depth of the Nicaragua. 

Roasted 20 seconds in to 2nd 

Start of 2nd

1 minute in to 2nd

After resting for six days I made my morning cappa with a 100% brew ratio. 

It's a very mild blend considering all three coffees roasted in to 2nd. 
It's actually a bit doll.... 

Second I tryed a 80% BR- a little better but still very neutral. Not exciting in any way, but not bad either. 
Subtle notes of nuts, the balance is very good. A bit to the acidic side. 
After resting for ten days now, it has developed some more, and improved in taste. I upped the dose to 18,5 gr for 22 gr of coffee. Its very silky and smooth.
A good coffee for guests i think, because of the subtle power.

Roast #2

This roast is made by 50% Brazil Daterra Sunrise and 50% Costa Rica Tarrazu.
Many roasters use Brazil as a base in blends, as they think it's a coffee with little excitement in it. 
I think that Brazilian coffees, especially the Deterra ones, is delicious. Maybe it's because I drink cappas mainly, and the Brazilian coffees is rich in sweetness. 
I hope the Brazil will ensure high sweetness and power. Again the Costa Rica is a base, with the acidic qualities. 

20 seconds in to 2nd, this coffee is very ugly and uneven in structure during roast. But as it hits 2nd it evens out and gets all smooth. Not a difficult coffee to handle. 

30-40 seconds in to 2nd. In my experience all Brazilian coffees roast fast. From starts of 2nd till very (maybe too) dark usually happens fast. 

Not a mind blowing experience... 
Unfortunately I had some troubles dialing in my grinder, that resulted in many sink shots and only a couple of descent shots to evaluate properly.
What I got was another mild blend. Clear taste of hazel and a nice creamy chocolate. Not enough chocolate though, so that's something to improve on.

Roast #3
Roasted 1,5 min in to 1st

This is a yirgacheffe from Ethiopia.
I have had this coffee from Øristeriet roasted for drip, once before and I really loved it. 
I knew it was very bright, and I have decided to use it for drip only. 
I took the roast a bit further than I usually do with my drip coffee, because I knew its bright. 
And it's just the best drip coffee I have ever consumed. 
I'm brewing on V60, 14,5 gr for 220 gr water. 
It's a flawless lemon taste with no sourness, it developes in to a well balanced rich coffee with deep honey. 
Try it if you should get your hands on a yirgacheffe. 

Roast #4

Well into 2nd - about 1,5 min

45-60 seconds in to 2nd developes rapidly when entering 2nd

Till start of 2nd

A late and rather short review of the roast above...

This blend didn't do well for me... 
The taste were a bit sour, no matter what I tried to overcome the sourness, it just staid sour and doll at the same time. Didn't put much thought in to it further than that. Just on to the next one. 

Roast #5

With this roast, and propertly many others, I have decided to go a lot further in to 2nd. Many of the roasts above was okay, but just a tad to doll.. With this dark strategie I hope to get much more, and powerful flawor. 


1,5 min in to 2nd

1 min in to 2nd - roasted harder than ussual

The dark strategie did a huge difference :)
The chokolate came, and It was full of power. 
Lots of chokolate and nougat in this one. 
Must admit it is a bit to dark. A little bitter in the end, and it seems there's more to get out of this by going a little lighter. 

Saturday, December 14, 2013

The Perfect Capucinno

As many of our readers know, I'm a dedicated capucinno consumer.

I would like to describe to all of you what a perfect capucinno is in my opinion. 

It may seem straight forward to brew and make a cappa, but I have tried many different approaches, and found that these steps make my favorite. 

I use a 180 ml cup, always preheated. 

My beans are always roasted to 2nd crack.. Doesn't matter if it's a blend or SO, always take it to 2nd. More sweetness and deep flavors to support the rich milk. 

I have learned that a ristretto is the best for my cappa. For a long time I used a regular espresso with a 50% brew ratio.
But it became to powerful and bitter many times. Had a hard time controlling it, and getting continuos results. 
The ristretto is easier to handle for me, and simply tastes better.  


I have my grinder timed to deliver 18 grams. 
With those 18 grams, I get a ristretto weighing 18-22 grams in 25-35 seconds - including 2-3 seconds of preinfusuion.

That's the base and most important thing in every espresso drink. 
A good tasting shot. 
No matter how flawless your microfoam is, the taste of under or over ecstracted espresso will be dominating to the flawor. 

I top the shot with perfect microfoam. If I'm lucky I draw a descent piece of art to satisfy the eye as well !

I have made a smal video of myself making a cappa, to visualize my descriptions. 


I hope you've found this usefull, also I hope you too like this recipe as much as me !

Enjoy... 


Thursday, November 28, 2013

Adjusting the Pump Pressure on Rocket Evoluzione v2


I have owned a Rocket Giotto Evoluzione v2 for about 1,5 year now and therefore have brewed a lot of espressos in that period. During that time I had tuned the extraction process and thought that things couldn't be better. Nonetheless I found that the second manometer only showed the pump pressure and therefore not the pressure at the brew head.

During the extraction process, the arrow of the pump pressure manometer would show a satisfying 9 bar and I assumed that the brew pressure at the brew head would be similar to the pump pressure. I was in for a chock when I discovered that this wasn't the case.

I have thereby created a short and simple how-to guide, that will show you how to adjust the pump pressure on the Evoluzione v2, so you will achieve the correct 9 bars of pressure at the brew head. To perform this guide you will need a portafilter with a manometer/pressure gauge (above picture).


The Rocket Evoluzione v2 comes with a rotary pump and therefore has the ability of connecting the machine directly to a water source, instead of using the water tank. Rocket have designed the machine so you easily will be able to adjust the pump pressure from the outside of the machine.
1. Turn on the machine. 
2. Locate the adjustment screw (above picture).   
3. If you want to increase the pump pressure, turn the adjustment screw clockwise and anti clockwise to decrease the pump pressure. 

4. Mount the portafilter and start the brewing (Remember to tighten the portafilter firmly, because it will unmount when the pressure is building up).  
The pressure gauge will now show you the actual pressure at the brew head, and if your machine delivers 9 bar at the brew head, then all is perfect. If your machine - like mine - was providing a pressure of 8,0 - 8,5 bar at the brew head, then you should adjust the adjustment screw like described at step 3.


When I was done adjusting the pump pressure, the pump pressure showed about 10 bars of pressure, to perform the optimal 9 bars of pressure at the brew head.


Did the adjustment have any affects on the espresso?
YES - the main change was the extraction flow! Before, the espresso could run perfect in the start off the brewing process and afterwards the water could soak though the puck, causing a very thin and bitter extraction. The pressure is now creating a firm puck and therefore preventing channeling, which leads to a way better extraction.

// Hendrup

Tuesday, November 26, 2013

Just Received My New Reg Barber Tamper


Just received my beautiful new Reg Barber Tamper in Bubinga Wood and Custom Art Work from Canada --> Happy as hell!!!

Review coming in the nearest future.

// Hendrup

Monday, November 18, 2013

Espro Toroid Steam Pitcher - Review


At Coffee Channel we came across this pitcher. It seems to good to be true. Luckily Øristeriet has supplied us with one, we can test.
Basically Espro claims that your able to produce flawless microfoam with very little effort.


First off is the official presentation 
http://espro.ca/toroid/

Following this link, you can see a full presentation and a video
For some reason I can't insert the video directly
Only our pitcher is a version one !


As shown in the video, the steamwand could be placed right in center, and the bump in the bottom of the pitcher should do the work.


What made me wonder, is that the pitcher isn't used in the video. There's only animated illustrations of the functionality. Also, there's no actual latte art pouring. Only pictures, of latte art drawn with chocolate ?

I have tried approaching the steaming in different ways, and also filmed the attempts.
It can be rather difficult filming and steaming simultaneously, but you should be able to get the bigger picture.


First off I tried like the presentation, right in the center. No movement at all.


The result is actually pretty good. It's hard to capture all the details in the video. But the foam is pretty shiny, there's a bit of hard top foam - and some bubbles. 
The foam is descent, and any one should be able to do that. With months of practice I can only imagine improvement.


Of corse I have done several attempts before shooting the videos.


To get the above result, you have to fill up at least till the spout. Any less, results in to much power at the bump in the bottom. And this


Way to much air in the milk, no way to control it either.


Next off I steamed with the same technique  as I do in my standard pitcher. A small angle, wand resting on the side, introducing a small amount of air all the time.


The result are defiantly better. Much more smooth and less bubbles.
I believe this shows, that the technique the pitcher is sold upon isn't the best one available.


Now a video of my standard pitcher and routine


No bubbles, very shiny and wet foam. I believe this is much better than with the Toroid.
That said, keep in mind I am very used to this pitcher, and I know exactly how to hold and rotate it to get the effect I want.


Conclusion
Well... I don't think the pitcher lives up to its promise.
I doesn't produce perfect microfoam with the technique shown in the presentation video. But, it does make descent foam with no effort what so ever.
Also because of the bend walls, it's tricky to pour from. You have to tilt the pitcher quite a bit to get anything out. I couldn't make any kind of art. But then again, if I gave it two months -  I'm sure I would be use to handling it.
If you are an ambitious upcoming barista, I would recommend buying a standard pitcher recommended by known baristas. Then work towards the correct technique and nice microfoam. Flawless foam requires practice and many tries. Maybe you would be able to get flawless results in the Toroid, but as a novice it doesn't make it for you.


If you would like a latte without being a geek about it, this is defiantly an option. Also my wife is fond of it already. She couldn't get the hang of my technique, so she has always done mediocre foam with a very hard top. With the Toroid she can make foam exactly like the first video. Time after time.
And honestly I have to agree with the misses. It is a prettier pitcher than the standard ones !


It can be bought from Øristeriet following This Link

Enjoy..

Wednesday, November 13, 2013

How To Install Thermosyphon Restrictor In a Rocket Giotto (HX)


Ever since I bought my Rocket Giotto I have been annoyed with the need and amount of flushing involved.
My pressurestat are set at 0.9-1,1 bar, which gave me an idle temperature of 98-100 degrees Celsius. I flushed about 1,5 oz before every shot. Not only did I use a lot of water, I also spend a lot of time doing it.
So I bought a thermosyphon restrictor.


 A small piece of brass, designed to reduce the water flow to the group head, and lower the temperature. Very simple, inexpensive and relatively simple to install.
After installing it, my machine idles at 88-90 degrees Celsius - and I now flush UP in temperature. Just like a dual boiler. My flush time is 2 seconds. I think the upgrade has been awarding in a very big way.

First of take of the top.
Remove the tank, sides and rear.
It's a lot easier when the work space is as big as possible.

Locate the pipe, coming from the boiler to the brev head and take it of.


The restrictor is suppose to fit inside the 90 degree bend on the boiler.


Make sure the inside of the bend is clean, if there's a bit of scale on the walls, the restrictor won't fit.
Even though my walls were clean, the restrictor didn't fit. I had to grind it a bit. You should be able to push it inside, but still have a tight fit, so that it doesn't tilt inside.


Install the restrictor with the small end in the bend.


Remount the pipe, lube the ends a bit with food grade lubrication, and be gentle with the tightening.


Turn on your machine and activate the water, do a couple is bachflushes to make sure it doesn't leak anywhere.
When you are certain everything is sealed properly, let the machine heat for 30 minutes.
When it's heated install your pressurestat at 0,9 when it's at the lowest. That way you should end up with a "cold nose" !

With the low pressurestat setting, my steam power went down a little. To compensate for that, I removed the silicone hose inside the steamwand. Basically the silicone hose make sure the metal doesn't heat when steaming, providing you with a no burn steam wand. But at the same time it makes a lot of resistance in the steam.

The easy way is to take of the steam tip, and just pull hard in the hose.

The better way is to take it all apart and lube everything at the same time.

Disassemble the wand from the machine, be careful with the spring.


Take of the ball joint and remove the hose.


Assemble everything in the same order, but lube the Ball joint and spring with food grade lubrication.
Now your wand will rotate flawlessly and still deliver a lot of steam.
But remember its hot now !

As mentioned this is a profitable modification to any HX machine that idles at high temperature. So get going and do the mod.

Enjoy

Friday, November 8, 2013

Panama - Duncan Estate Review


After visiting Great Coffee in Aarhus, we took a bag of their new Panama home with us.

The Panama Duncan Estate is a Arabica Bourbon, 100% organic bean. Roast master Søren Stiller describes it as tasty orange peel, blueberrys with sweet milk chocolate and notes of lemon. 

Great Coffee is a very respected and recognized roastery.Like many other roasters in the north, their doing the Nordic approach which is very light for espresso.Looking at the bag I'm just amazed. This is a clear sign, that the roast master wants nothing but perfection. A recipe for the perfect extraction.

18,5 gr dose. Extract to 34 gr espresso in 26-28 seconds, giving a brewratio at 0,54%


This tells me, that someone has made a lot of effort to make my experience with this coffee, as good as possible.But I came to miss some sort of closing system.. I had to use a bag-clamp, which is meant for the purpose I know, but the thick structure of the bag made it impossible to seal completely with the clamp. Besides that, only positive about the bag.

Still a bit worried about the light roast though.Honestly, this color would be my home roast drip coffee....


It took me quite a while to dial it in. I had to adjust, a lot, towards finer.But when I hit the recommended brew ratio, I could actually see that it ran just about perfect.


Nice dry, and hard pucks

The texture is fantastic, an the color of the crema is unbelievable ! The smell is surprisingly doll. Notes of lemon mostly.. And, if it smells like lemon, it usually tastes like lemon.


My first taste, and I looked like someone who just eat an lemon ! Really, really not my thing these light roasts.


However I have a feeling that I have to get used to the new flavors for a while. Of course I tried it as a capucinno as well, did pretty good.


So for the past week I have been sipping a bit from every shot, before turning it in to my cappa.I have to say it grows on me, there's much more flawor, liveliness and fun in a light roast.I'd still prefer my own an other darker roasts in the future.. To me they taste better. I'm just a more in to chocolate and sweetness, than fruit and apple acid.


The Panama has a medium body, with a lot of power in it. The notes of blackberry, oranges and lemon are as mentioned almost overwhelming. Getting to know the coffee, sipping it the right way, and at the right temperature, it's very tasty.When it's cooled a bit it tastes better to me. The high notes of fruit has toned down a bit. At that point the body enhances, and the darker notes are more visible. At that point I can also sense the blueberries and chocolate that the roast master describes.


I mainly consumed it as capucinno, and it was actually nice getting some variation in my coffee routines. A light fruity roast combined with rich milk is a great combination. For a while. But, for every espresso consumer there is a different opinion in taste, luckily !! This is just my opinion.

Even though I'm not the biggest fan of Nordic Approach, I do like this coffee, and I can tell its a superb roast with a lot of dedication in it.

If you are fond of light roasts, fruit, high acid and perfection. You should defiantly try this.1 kg costs 250 kr/40$ - and that's cheap for premium coffee like this !


A small bonus is, that I seem to make much better latte art with this coffee, and much easier. Maybe it's just me, but still worth mentioning !


 Still have some troubles with bubbles in light roasts


                                                                                Enjoy !

Tuesday, October 22, 2013

NEW PRODUCTS, from the Host Fiera Milano (Oct 18th-22nd)

Host Fiera Milano 2013 has just been held, which means exciting product announcements from the global coffee manufacturing companies. Coffee Channel will therefore list some of the more spectacular announcements below, but first off, lets starts clarifying what the Host event is?

Host is the biggest hospitality industry expo in the world and takes place every other year, where thousands of vendors from different industries (Ex., Furniture and home wears, food service equipment, tea and coffee) collides under the same roof. 

1. Victoria Arduino 388 Black Eagle, Espresso Machine


Victoria Arduino - owned by Nuova Simonelli - is the espresso machine manufacture that produces the most aesthetic and delicate machines, and the release of the new concept prototype of the 388 Black Eagle is only a statement of that. This newly announced espresso machine is essentially a re-design of the great Nuova Simonellis Aurelia T3 machine, where the aesthetics is taken to a whole new level. 

James Hoffmann (2007 World Barista Champion), have in cooperation with Nuova Simonelli designed the 388 Black Eagle and the most exiting feature is the machines built-in gravimetric weighing system, which is incorporated directly into the grate above the machines drip tray.
"The gravimetric capabilities of the Black Eagle are designed around individual load cells, stored inside the machine and mounted within the drip tray grates using a simple and easy to remove latch. These load cells weigh the volume in a cup, which is the displayed in a digital read out above the group head, featuring both time and weight data. Software inside the machine tells the load cell what to read and what to ignore for example, the software can distinguish between reading shot volume and a barista´s hand inadvertently bumping the drip tray. Smart software is the key to making this gravimetric system work as advertised." Quote from sprudge.com
The new 388 Black Eagle is therefore a result of James Hoffmanns opinion that beverage mass is the most important factor in extraction and the beverage mass is king - we´re not as obsessed with brew time as we once were.

2. Sanremo Opera, Espresso Machine


The Opera espresso machine is made by the Italian company, Sanremo, based in Treviso. They have together with John Gordan (UK Barista Champion), developed an impressive new beast of an espresso machine. 

The monstrous machine has impressive five individual insulated boilers, one for each of the three group heads, one steam boiler and another boiler, the pre-heates the circulating water over the top of each group. The spectacular about this machine, is that is holds the option of two different flow rates!

3. Nuova Simonelli Clima-Pro, Grinder


James Hoffmann, Colin Harmon, Fritz Storm and Gwilym Davies have together worked on the Clima-Pro project, where they have tested and tweaked for two years. The main concern was that the majority of espresso related problems can be traced back to the grinder (Everything like, speed of service in the cafe, effectiveness of that service, morale of your staff, roast profiling, how we explore coffee and learn about coffee - it all comes back to grinding says Colin Harmon). The group noted that their had been some remarkable changes on the espresso machine side lately, but unfortunately not on the grinder side. 

The group was therefore determined to locate the main factor to improve and found it - ideal temperature for grinding espresso. Along with researchers from University of Alcona, the determined the best grinding range was between 35 and 45 degrees Celsius. The Clima-Pro grinder from Nuova Simonelli is therefore able to keep the temperature at 35 degrees for about 10 minutes, at intensive grinding. 

4. Marco JET, Coffee Brewer


The newly announced coffee brewer is from Marco Beverage Systems, and is a new batch brewer. The JET model is a filter coffee brewer, with a vacuum insulated dispenser and a touch-screen interface, and can brew between 2,0-6,0 l. of coffee per brew. The JET is designed to match the SCAE Gold Cup brewing standards, and is able to deliver less than 1% variance in water volume delivery and +/- 1,5 degrees temperature delivery (at the spray head). The announced JET brewer is currently a prototype, says David Walsh from Marco Beverage System, but the coffee firm is edging closer to locking in the final design. The Jet will therefore hit the coffee market in the early 2014. 

5. Mazzer "Kold", Grinder


The Italian grinder manufacture, Mazzer, has announced their new grinder, which is called the Kold. This grinder uses the same burr-set as the notorious Mazzer Robur, but the burrs is mounted offset on a belt-drive system, so that the heat from the motor doesn´t affect the coffee or burrs - thereby are Mazzer now mainly focusing on keeping the temperature of the burr-set and coffee grounds low. 

You have properly already noticed that the well known Mazzer collar system in the above picture is gone and therefore re-designed, so you know are able to adjust the grind setting at the side-mounted dial. Mazzer have also received a lot of criticism, cause their previous collar system wasn't easy to adjust, so hopefully the new side-mounted adjustment dial is way better. 

6. Marco Single Cup Brewer, Splurty


Marco Beverage System which also announced the JET coffee brewer, has also presented the Splurty. The Splurty is a minimalistic designed one cup brewer, that demands a minimum of counter-top space. The coffee brewer uses the Marco Pillar technology and is designed for Kalita filter baskets, - but is not limited to this particular brewing device - which is being held in place on the machines back panel using a magnetized basket holder. 

The brewing device functions like many other, where the heated water is dispensed over the top of the basket, where coffee volume and timing standards is selected by the user. 

All pictures are from sprudge.com

// Hendrup

Instagram